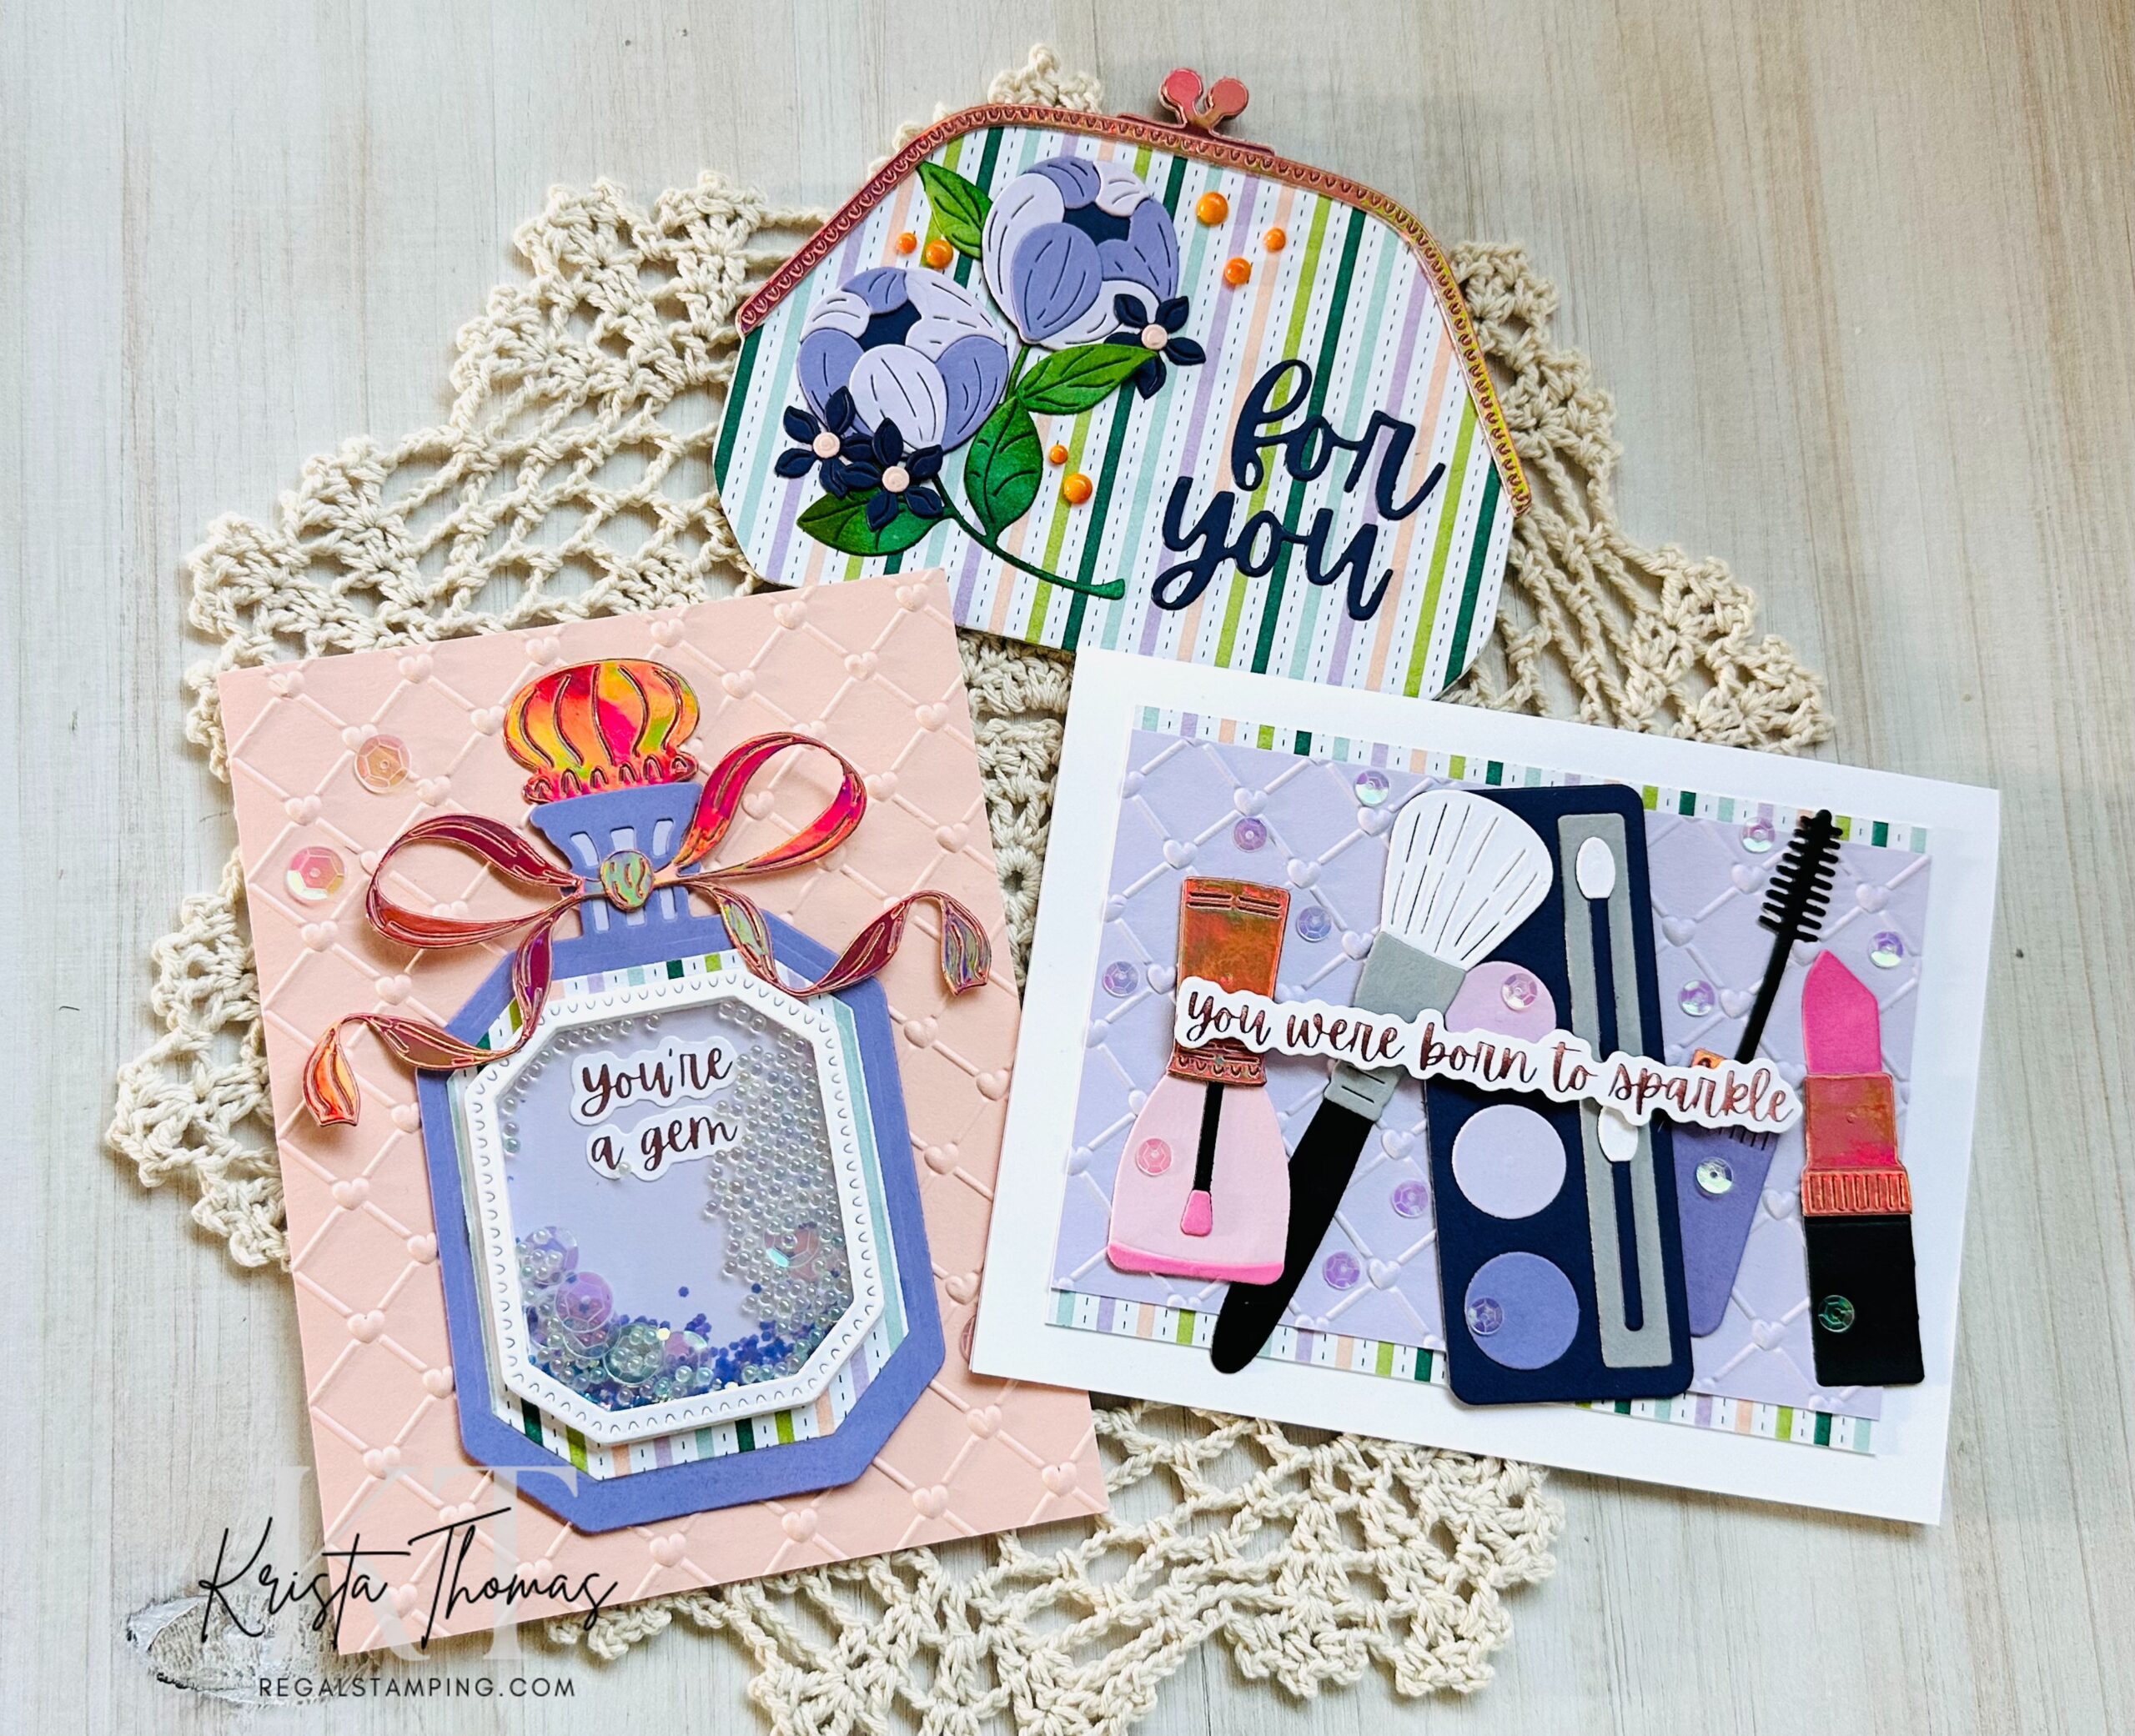
Debuting today from Spellbinders, is a lovely new collection of products geared toward any and all beauty enthusiasts. These Gorgeous You products are all about skin care and beauty! When I saw the Gorgeous You Make Up Bag set with its optional gift card holder die, my first thought was Ulta gift cards! I seem to gift a lot of those and this die set is going to come in handy for birthdays and even Christmas!
As you can see from the photo above, there are many components to this collection, so I’ll share a step by step tutorial for the make up bag, and then a quicker description for the other two cards.
Introducing Gorgeous You Make Up Bag


Let’s die cut some pieces!

- Begin by cutting out 2 of the make up bag outline from designer paper. My paper is a retired pattern from Stampin’ Up. These will be the front and the back.

- Choose another paper that will be for the insides, both front and back, and cut 2 more of the same die as before.
- Use the gift card holder die to cut slots into one of the inside panels. (See photo below)


- Use the top border (cut 2) and clasp dies (cut 4) from shiny foiled paper. Mine is cut from an iridescent grapefruit color.

- Glue 2 clasps together, shiny sides out. Repeat with the remaining 2 clasps.
- Sandwich the front panel with an inside panel, adhering together with the clasps at the top. Repeat with the back panel & inside panel (with the gift card slots) and the remaining clasp. Be careful not to put glue around the gift card slots!!
- Glue the top border pieces from above, to the front and back of the assembled make up bags.
- Cut 2 hinge pieces and glue together, folding on the score line.

- Use the folded hinge to connect the front and back of the Make Up Bag. I used white paper on mine for contrast, but you could use the same paper as your insides which would hide it better. To make it invisible, make the hinge a part of the sandwich from the previous step. I did it this way so that you could see it! 🙂
- Use a Bougie Birthday Sentiment on the inside, above the gift card.

Decorating the front
Now that we’ve assembled the make up bag, it’s time to decorate the front! I used the Gorgeous You Floral Dies to create a nice little bouquet. The flowers were cut from three shades of purple card stock and then pieced together. The leaves were cut from white card stock and ink blended with various Distress Oxide inks.

The sentiments (both inside and out) are from the Bougie Birthday Collection. I scattered some peachy-orange colored dots around the flowers and called it complete!
Introducing Gorgeous You Perfume Bottle

As you can see, I used the Gorgeous You Perfume Bottle dies to create a shaker card! The assembly begins with a light peach colored panel that’s embossed with Cross My Heart 3D embossing folder.
The bottle pieces are cut from two purples, white and more of the striped designer paper that was used for the Make Up Bag. The stopper and bow are cut from more of the iridescent grapefruit paper. I just LOVE that bow, don’t you?! It’s going to be useful for many other projects!
As for the sentiment inside the shaker area, it too, is from Bougie Birthday Sentiments.
Introducing Gorgeous You Make Up dies

Since I was making a trio of coordinating cards, this third one uses many of the same papers, colors and sentiment sets. The Gorgeous You Make Up dies are a huge set consisting of 24 dies! These are so fun to make and perfect for those girly-girl cards!
Use the gift card holder die (from the Make Up Bag dies) to make this into the perfect birthday surprise! Again, a gift card from Ulta or a similar store, and your birthday girl will be ecstatic!
I hope you’ve enjoyed this series of cards and are ready to make some of your own!
Until next time,
~Krista

Discover more from Regal Stamping
Subscribe to get the latest posts sent to your email.