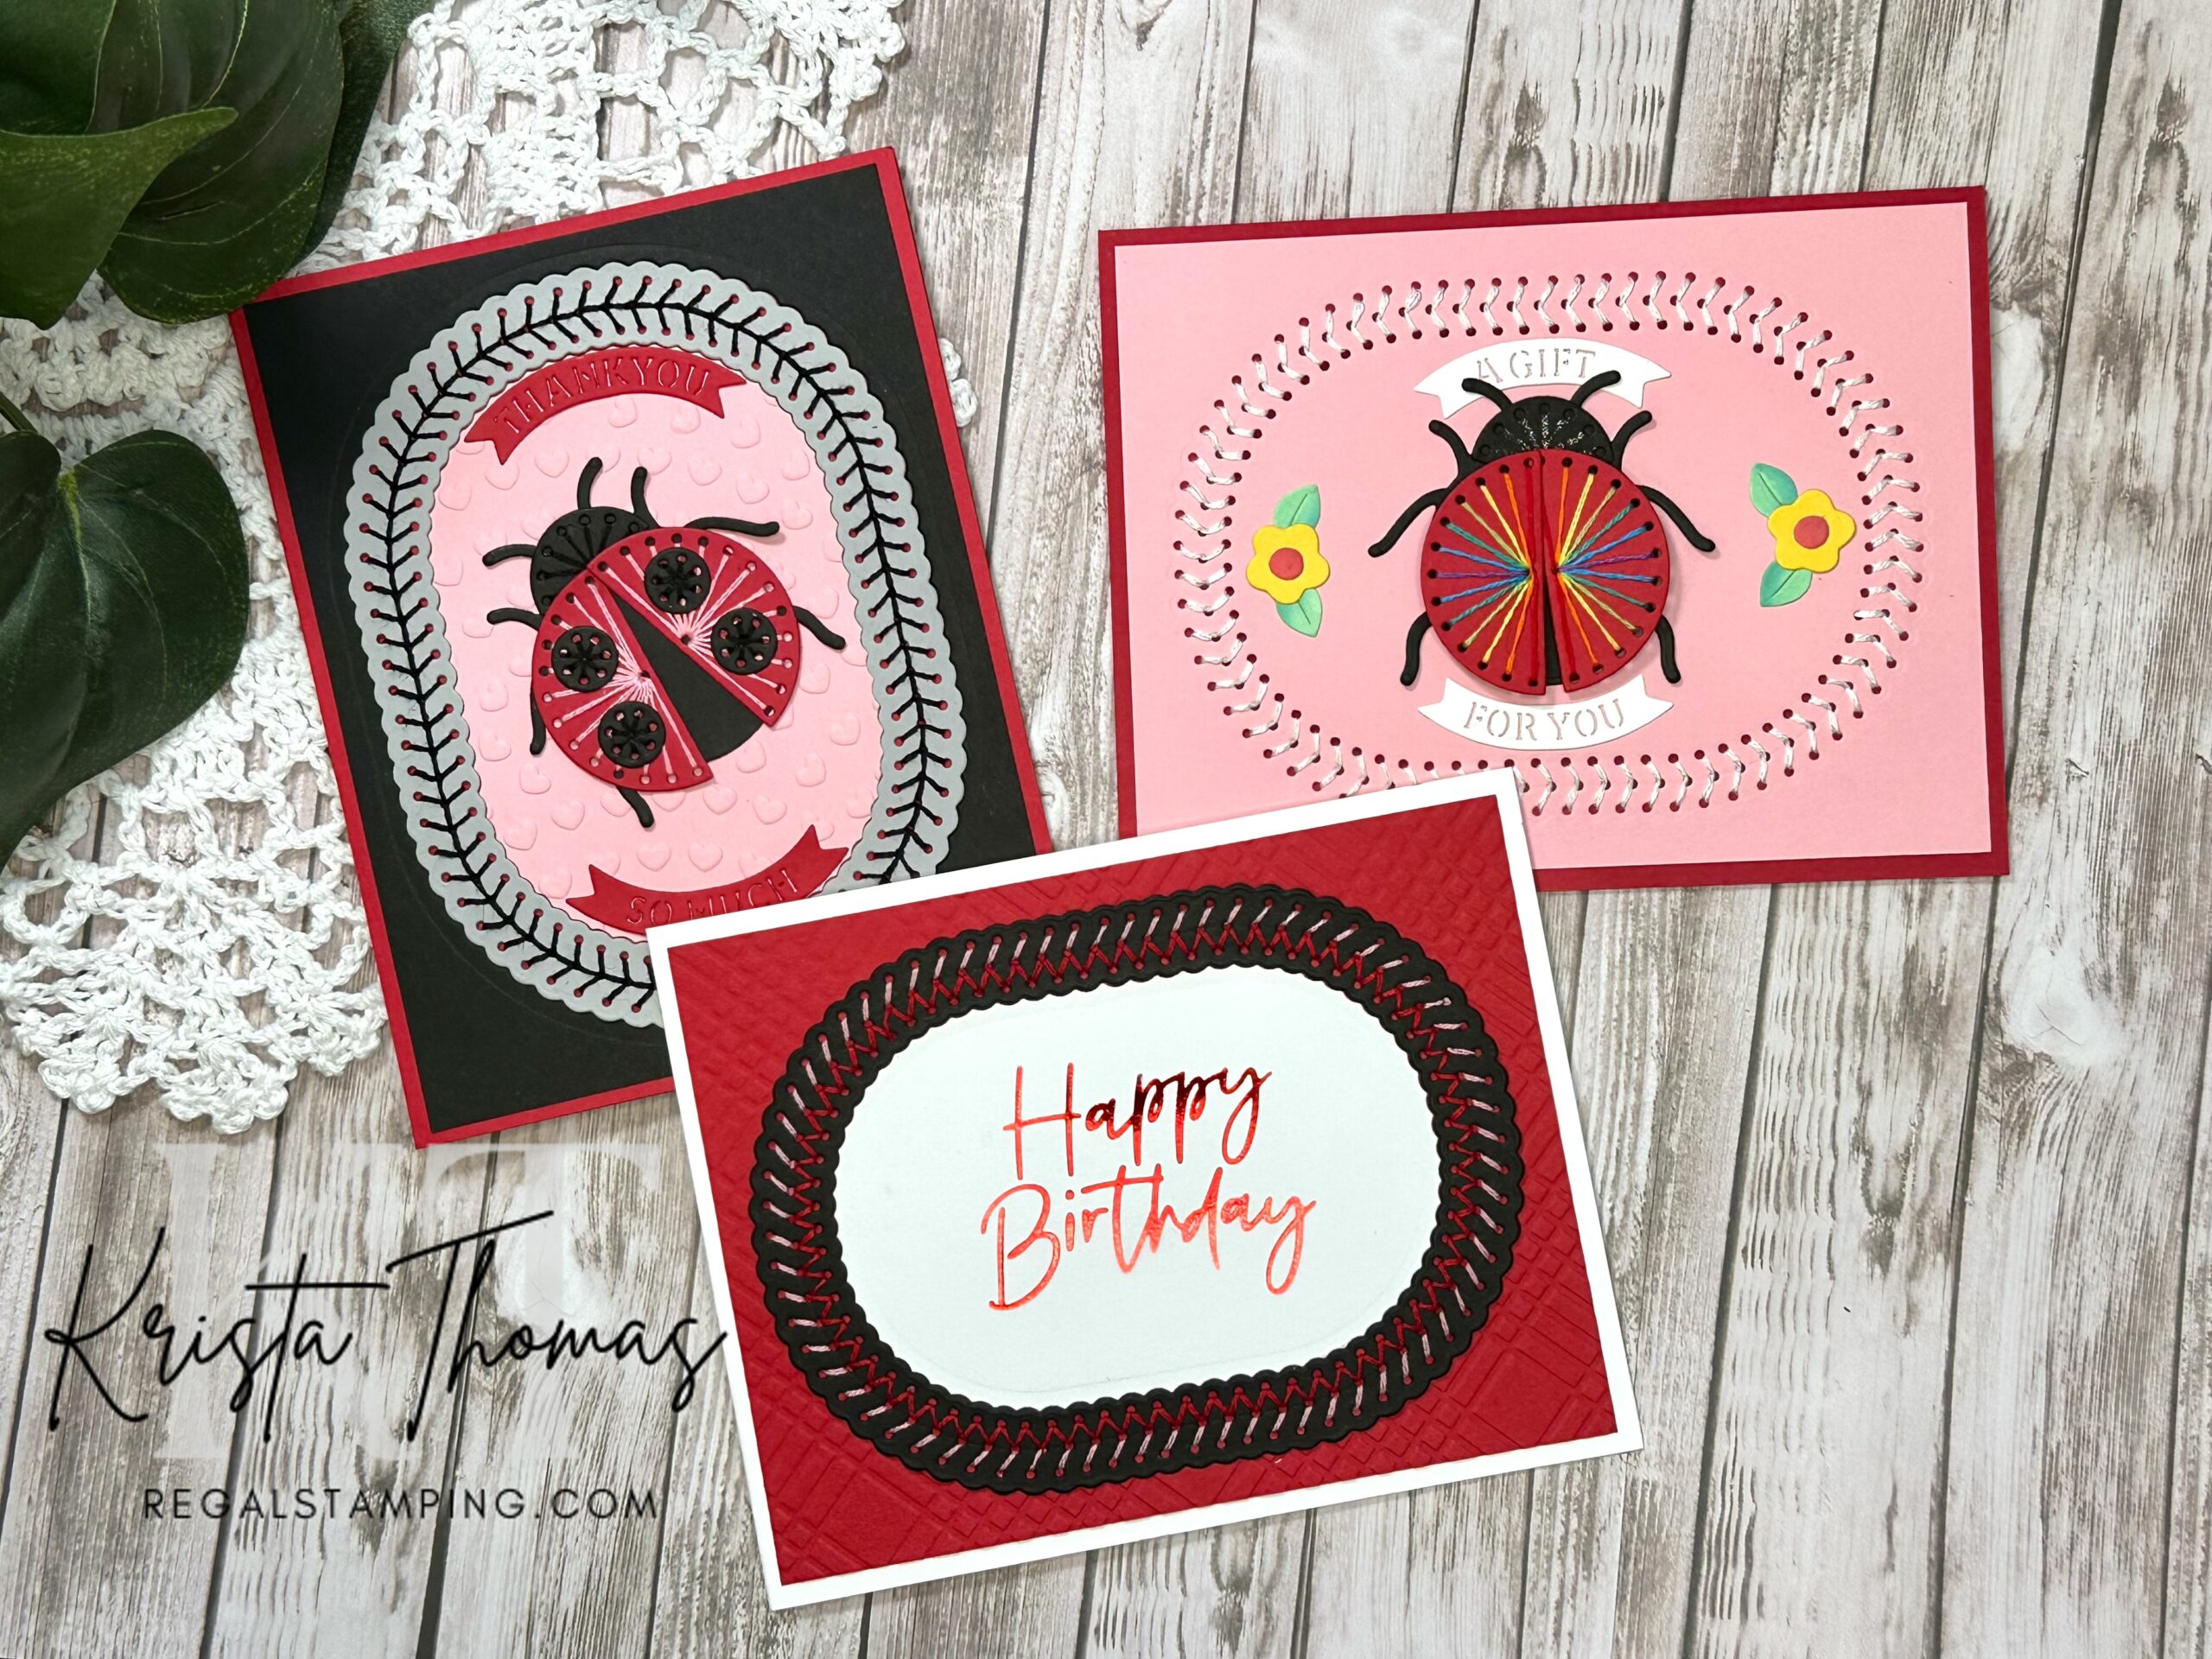
Hi again, Friends, and Happy New Year! I’m super excited to be sharing Spellbinder’s January 2025 Stitching Die of the Month which I received in advance. This month, the stitching dies include a ladybug and a stitch-able oval frame. I’ve been having a blast with them! The other January clubs include a beautiful dragonfly, butterflies and all kinds of coordinating products.
Spellbinder’s Monthly Clubs are such a good deal and are completely customizable! They offer so many choices and you can choose the club(s) you want or get The (whole) Caboodle which always includes a bonus item! You can cancel or change your club selection each month, so you’ll always be in control.

I’ve been fond of Spellbinder’s stitching dies for a while now, first sharing the Stitched Pineapple here and again here. I find stitching to be very relaxing, but if I’m pinched for time, I use a marker to draw the stitching lines, speeding up the process.
2 Tips for Using Stitching Dies
- Because these dies have tiny holes, it’s important to clean out the die after each use. You can make this process MUCH easier by placing a piece of wax paper or bakery tissue between the card stock and the die.
- After you’ve run the piece through your die cut machine, remove the metal die and use a rolling die brush or even a medium bristle toothbrush to gently rub out the little holes. The wax paper makes the pieces simply fall out.

Rainbow Bug card
I used the frame dies to cut out a variety of colors in pink, red, grey, black and white. Intermixing the colors, I put together this first card and made the ladybug’s wings rainbow colors for a fun twist. A glittery gel pen was used instead of stitching it’s head.
On the pink frame, I used white DMC embroidery floss to stitch around the oval shape in an arrow pattern which reminds me of the stitching on a baseball.

Ladybug Thank You card
For this second card, I once again stitched the frame but this time I added a center row that runs the entire oval. The pink center oval was embossed with a tiny heart embossing folder.
For this ladybug, I used pink DMC embroidery thread on the red wings and black thread on the head and black spots. Notice how the sentiment banners are curved to match the shape of the oval, making everything coordinate wonderfully!

Foiled Birthday card
Finally, on this last card, I used Happy Birthday Glimmer Plate with red foil. On the black frame I did a zig zag & slash design in pink and red embroidery threads. I used Diamond Plaid Embossing Folder on the red background panel.
I hope I’ve inspired you to give stitching dies a try, whether you actually use a needle & thread or just a marker for the stitching!
Until next time,
~Krista


Discover more from Regal Stamping
Subscribe to get the latest posts sent to your email.
