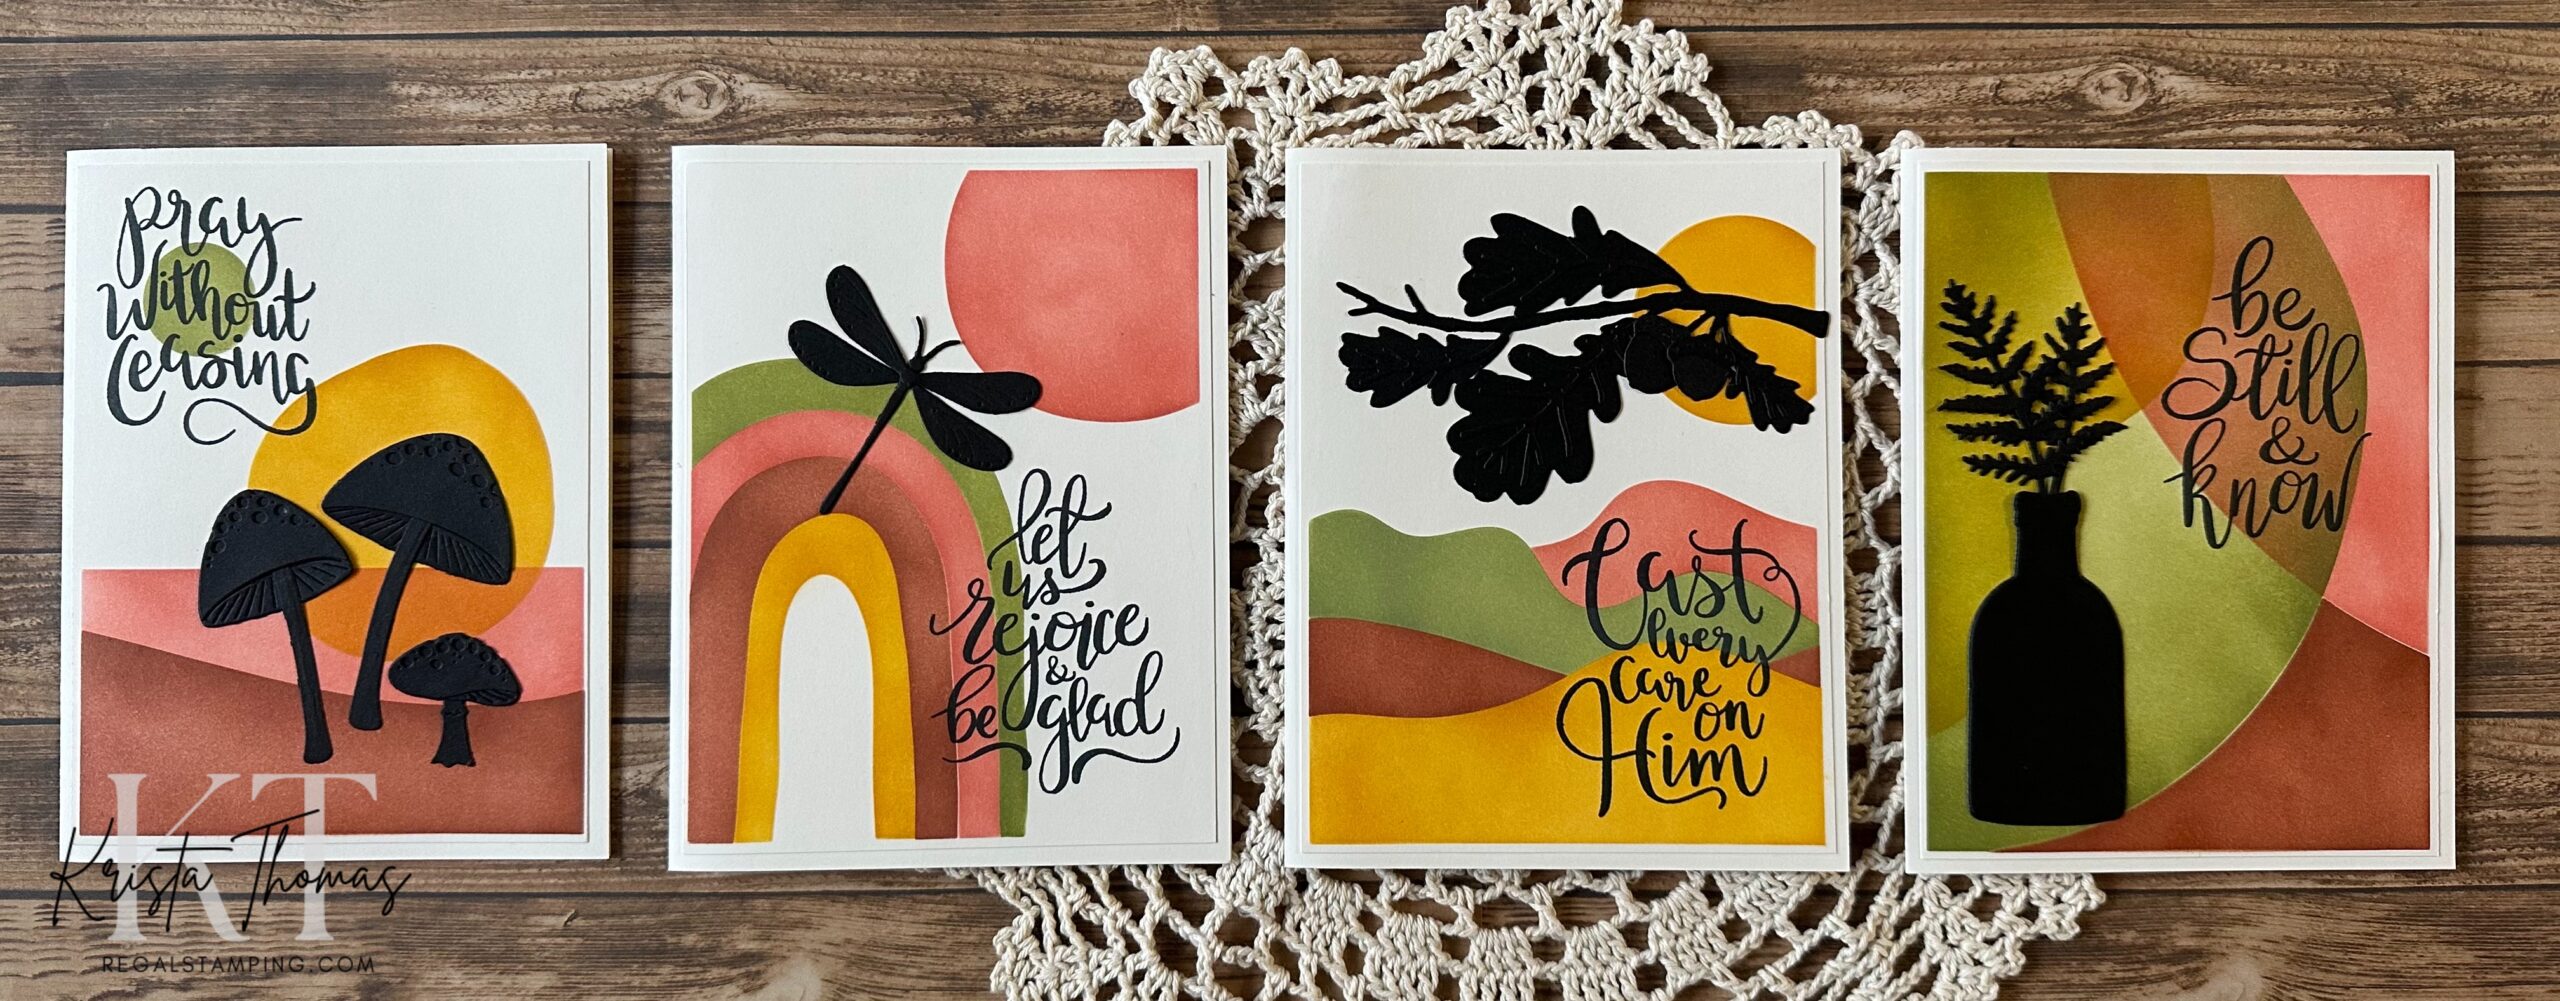
I am excited to share today’s cards which started with some Taylored Expression stencils. I used their Create-in-Quads Layering Stencils, Abstract, which literally makes four cards at one sitting!
Discovering innovative products like these always excites me and I’m amazed at the brilliant minds behind them! What innovative products have you discovered? Please leave a comment and tell me about it so I can go check it out!

Getting started…
I chose four ink colors that I thought would work well and then cut my cream colored card stock to 8″ x 10 1/2″, placing it on a LightGrip Cricut mat to hold it in place. After centering the first stencil over the paper, I began inking away. I love using blender brushes because the results are so smooth and my fingers stay clean! Check out the step by step process in the collage below! You’ll notice that there’s lots of ink around the stencil openings and that’s because I start blending off-paper first. A quick rinse with water and the stencils are clean and ready for the next project!
A visual of the process in 6 steps

Once done, I used my X-Acto Paper Trimmer to cut between the designs, resulting in four card fronts! So quick & easy!!
From dies to silhouettes…
To create some silhouettes, I shopped my stash of dies from The Greetery and then cut them all out of black card stock. I used BotaniCuts Toadstool Garden Die, piecing them together before placing them on the stenciled panel.

Next I chose The Greetery’s BotaniCuts Mighty Oak Dies, assembling the leaves and acorns onto the branches before adhering to the card front.

For the final two cards, I used The Greetery’s Curio: Summer Findings Dies and Bottled Up Dies. The dragonfly was assembled and glued it to the third card front and then the fern (cut twice) added to the bottle die and onto the last card.


The religious sentiments are from Comforting Commands Stamp Set stamped in Memento Tuxedo Black Ink. I used my Misti Stamping Tool and double stamped each verse so that they were nice and dark.
Each card front was placed onto a cream card base, leaving the inside blank and ready for a custom sentiment when the need arises.

When you learn to stencil on your paper crafting projects, it opens up all kinds of creative opportunities! You can see how I used stenciling for a couple of the bookmarks in this post.
I really hope you enjoyed seeing my first Fall themed cards of the year! I’ll be back with more very soon, so consider subscribing so that you don’t miss a single post.
Please note that this blog post contains affiliate links. If you click on a link and a purchase is made, I will receive a small commission at no extra cost to you.
Until next time,
~Krista
Follow me:Discover more from Regal Stamping
Subscribe to get the latest posts sent to your email.
