Have you ever found yourself searching for that perfect final touch to complete your card designs? I know I have! I often sift through my stash looking for just the right accent, only to come up empty-handed. But during a recent card-making session, I discovered how beautifully mini wax seals can elevate a project—they make the perfect finishing detail!
Spellbinders’ mini wax seals are a fantastic new addition to their already impressive lineup of larger seals—and they’re perfect for adding charming accents to your cards! With four delightful mini designs to choose from, these little seals can take your creations from simple to stunning in no time!
Making Mini Wax Seals
Making a wax seal requires a few tools, but once you have them you’re good to go and the initial investment is SO worth it. Following, is a list of what you need:
- Wax seal stamp
- Wax melter & tea light candle
- Wax melting spoon
- Assortment of wax beads
- A silicone mat
Thankfully, all of these items are available through Spellbinders and if you’re a club subscriber you’ll get a discount on this Wax Melt Starter Kit. You can also find starter sets on Amazon.
Scroll through the carousel below to see the process of wax stamping:


For comparison sake, here’s a photo showing a mini seal next to a standard sized seal.

Let’s be creative using mini wax seals…
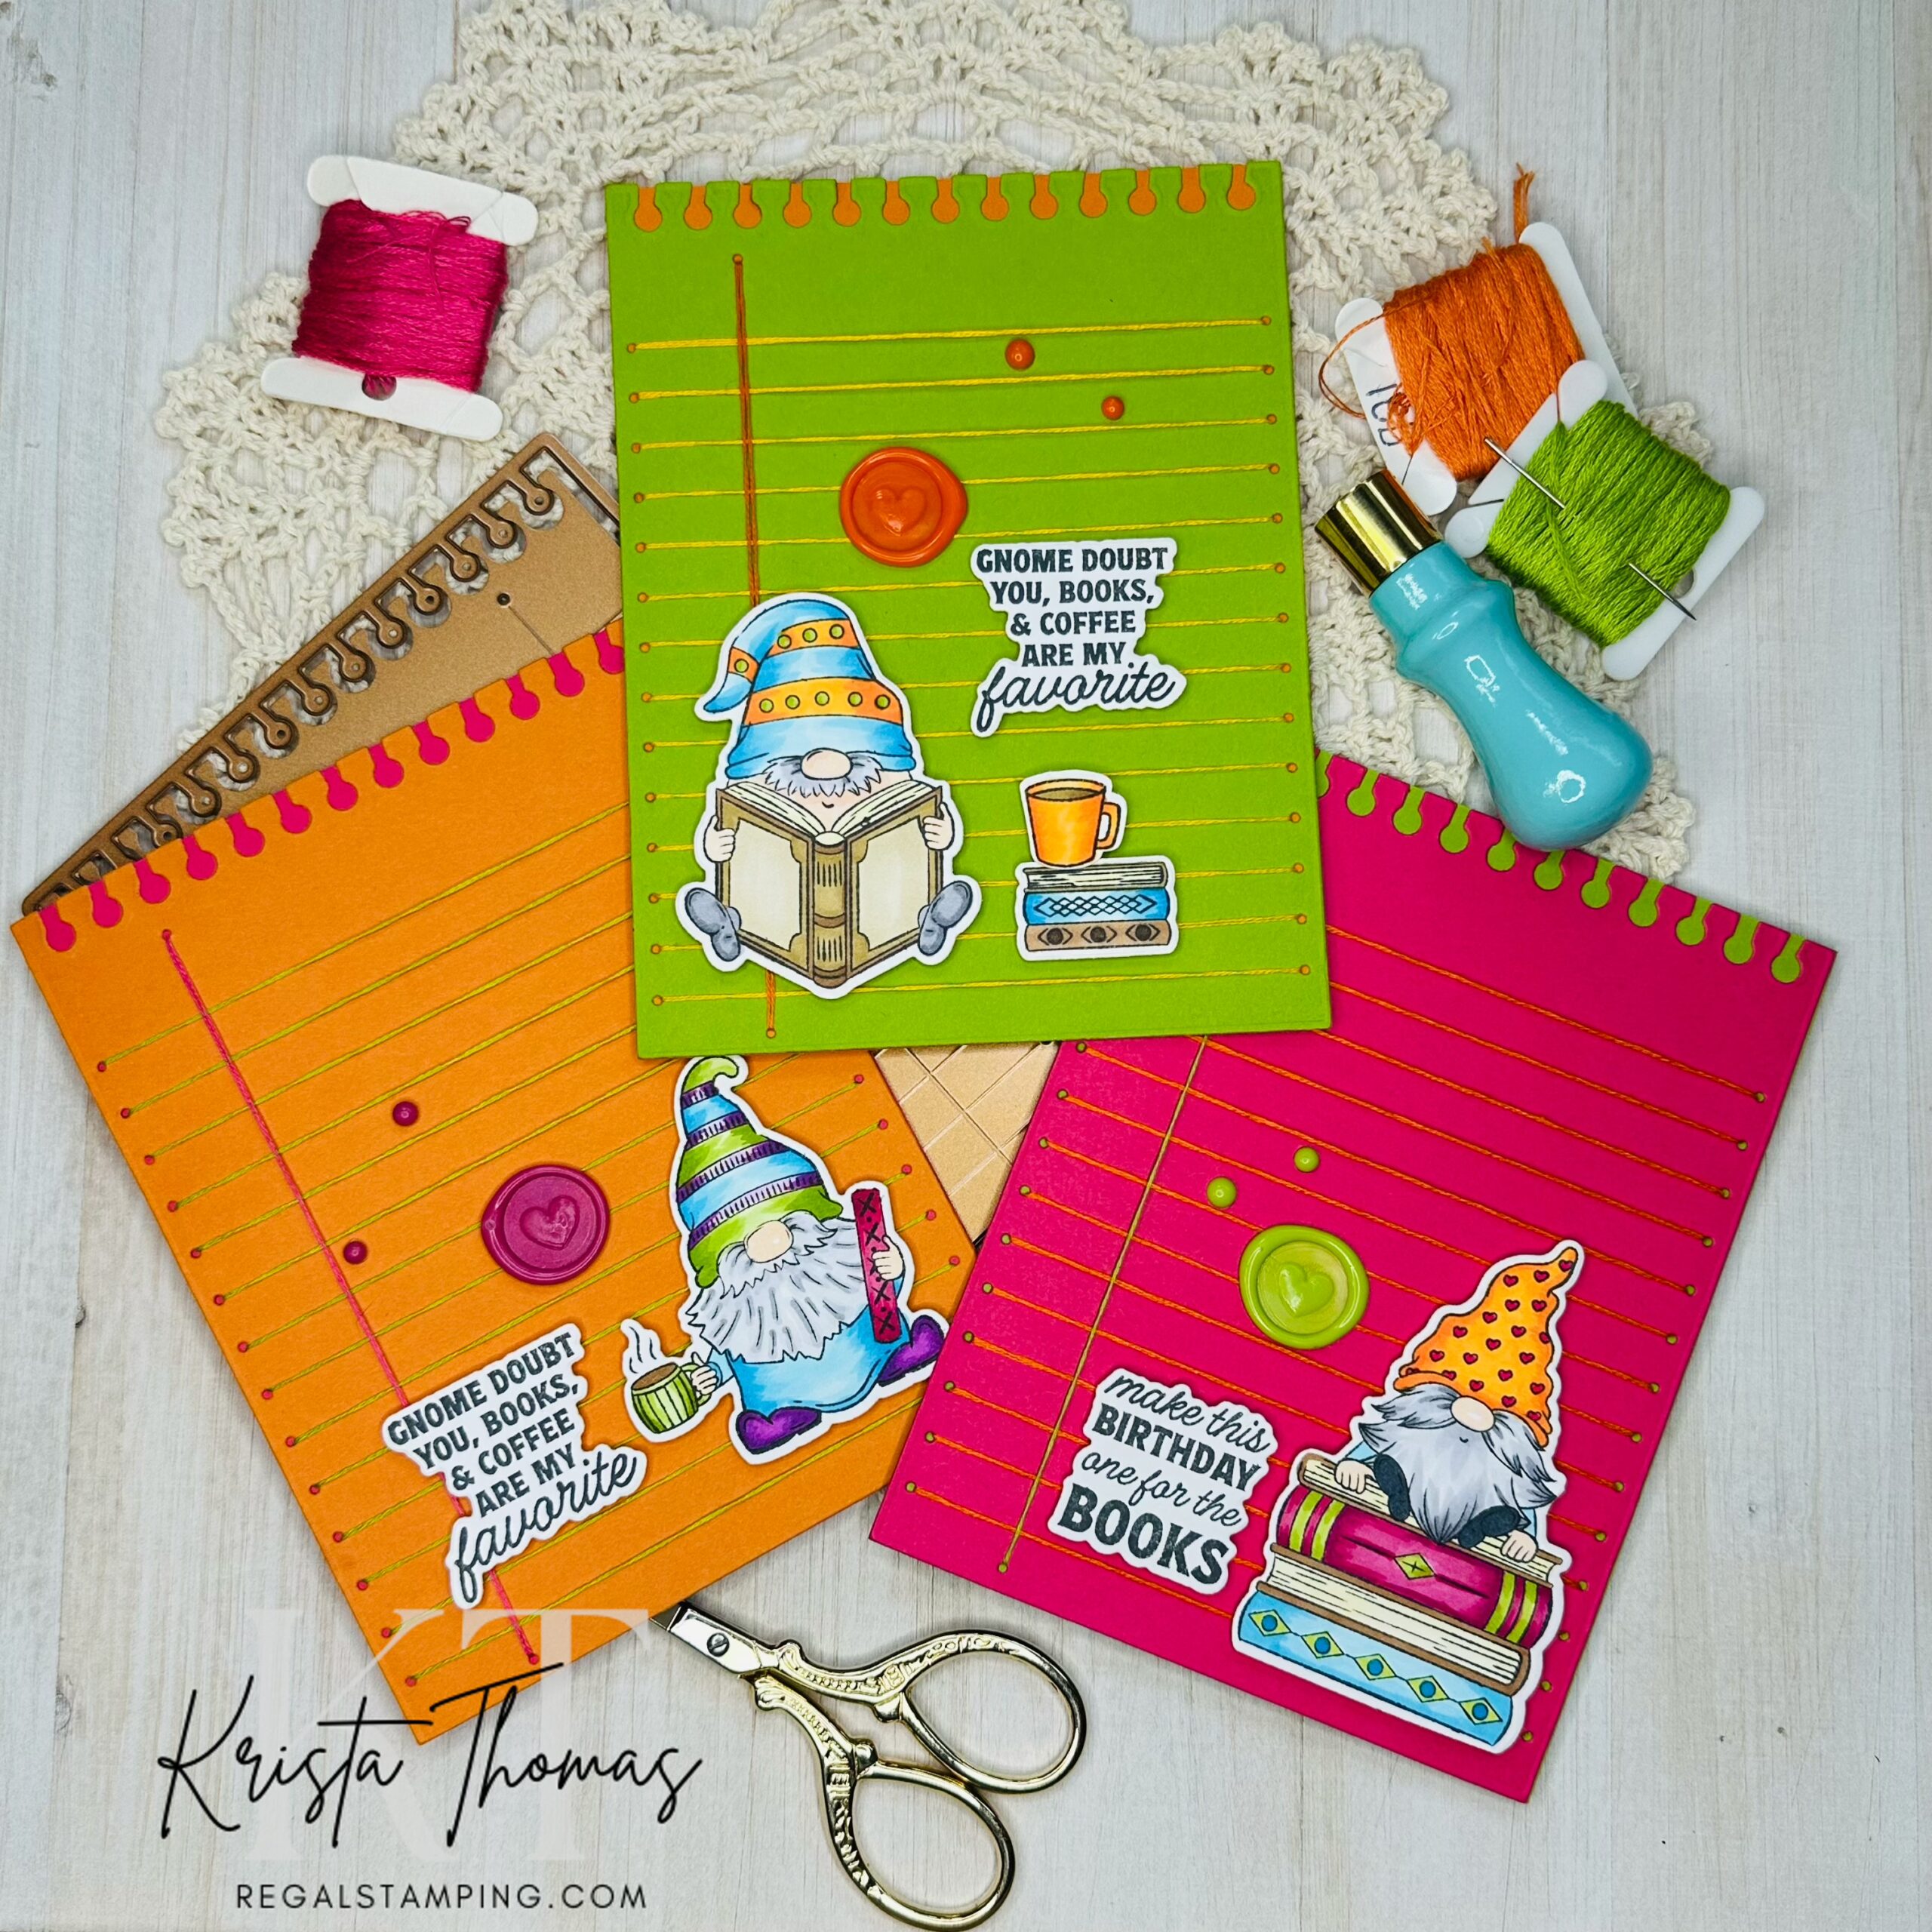
On today’s trio of cards, I used the newest stitching die, Taking Notes, as well as the adorable Storytime Gnomes stamp set and created a color coordinated set of cards. The finishing touch for each of them was made with the Puffy Heart 3D Mini Wax Seal, along with a couple coordinating wax “drops”.

After choosing a bright, cheerful color palette of lime green, turquoise, hot pink and orange, I die cut the backgrounds with Taking Notes stitching die. Mimicking the bright colors with embroidery thread, I stitched the three pieces and adhered them to their card bases.

Each gnome was stamped, die-cut, and colored using Ohuhu Alcohol Markers. I absolutely love using these fantastic, budget-friendly pens! I’m working with the Honolulu B Series set, which features dual tips—a fine point and a brush tip—that make coloring a total joy!
Adding “pun-y” sentiments
I added sentiments from the same gnome stamp set, cutting them out with their coordinating dies and placing them on the card fronts. I’m always a sucker for a good pun!

Finally, I added the color-coordinated wax seals and “droplets”, scattering them in a triangular pattern on each card. I like having lots of wax colors to choose from, and have purchased assortments such as these on Amazon.


A quick design tip:
Arranging accents and images in a triangular pattern helps guide the eye smoothly across the project. For a more visually appealing effect, use an odd number of accents!
In conclusion…
As we’ve discovered today, mini wax seals are a delightful way to embellish your handmade cards! By using the excess wax to make droplets, you end up with perfectly matched accents in varying sizes.
I hope you’ve enjoyed seeing these bright colored cards and learning a bit about the process. I’ll be sharing some cat & dog cards with a softer color palette in my next post, so be sure to subscribe and you’ll never miss another post! If you’d like to see more cards with these mini wax seals, you’ll find them in my previous post, here.
Until next time,
~Krista

*This post contains affiliate links. If you click on a link and make a purchase, I receive a small commission at no extra cost to you.
Follow me:Discover more from Regal Stamping
Subscribe to get the latest posts sent to your email.